Pages

Dec 5, 2014

Make your multi-colored LED Christmas lights look like warm incandescent


In recent years, LED Christmas lights have gained popularity-- as they should, since they are far more energy efficient than traditional incadescents! Things that are good for the earth (and my energy bill!) make me happy. :) However, sometimes I miss the warm, comforting glow of the incandescent lights from my Christmas past. I know I'm not alone. Companies have finally started to come out with "warm white"-- a warm LED alternative, a welcome shift back toward the comforting, inviting light that we should be able to enjoy around the holidays. However, companies still haven't figured out that they have yet to perfect the multi-color LED Christmas lights! The blue light in most mutli-color LED strands is so blindingly strong it overpowers all the other colors, and the magenta pink shade is missing in nearly all the popular brands. Perhaps it bothers me because pink is my favorite color, but there's just something comforting and Christmas-y about that warm magenta shade that the primary colors in today's LED strands are missing. Most strands I've seen feature red, blue, yellow, orange and green, which in my opinion makes them look like they would fit better in a kindergarten classroom than on a Christmas tree. But to each their own!


Even pictures of LED lights hurt my eyes.

So, hoping to keep my electric bill costs down this year, I went on the hunt for warm, multi-colored LED lights for an affordable price. When that couldn't be found, I tried to find a set that included my beloved magenta color. I found a few options (For example, Set of 100 Multi-Color LED Mini Christmas Lights - Green Wire) beyond my price range. I finally settled on purchasing sets of 300 lights from Big Lots for a much more affordable price, AND the color scheme included purple, which I was hoping would turn out to be close-ish to magenta when lit.

Unfortunately, after plugging them in, the purple bulbs were just blue plus red and so the bright blue light was still overpowering. Additionally, I discovered that dome-shaped lights do not diffuse well when bright blue and green spots peppered my ceiling and walls from my new LEDs. The mini incandescent bulb shape diffuses the light out the sides so that they don't become tiny spotlights.


cold, uninviting spotlights

I knew then that I could either return them or try to find a DIY fix for my disappointment. Preferring the latter, I pulled a red Sharpie marker from my office supply drawer and colored on one of the blue bulbs (my least favorite) to test what effect the marker would have on the quality of light. 


To my delight, it significantly dulled that eye-piercing blue quality and reduced the "spotlight effect" at the same time! 


Encouraged, I colored in a purple bulb-- and it turned pink! 


Woo-hoo! Success!

Ecstatic with my discovery, I immediately set to work coloring in the tops of every single bulb (to reduce the spotlights on my walls) and completely covering the blue and purple bulbs. Comparing the untouched LED strands to the strand I had hand-colored showed a significant improvement in the quality of light. 


Marked LEDs on left, untouched LEDs on right.


Untouched LEDs on left, marked LEDs on right. Notice, no spotlights on the right!


In the end, I found affordable colored LEDs that didn't blind me and that featured the missing magenta. They still aren't as... pastel, as incandescent lights are, but they look significantly better than they did straight out of the box. Maybe in a few years they'll figure out how to more closely replicate the incandescent colors in energy-saving LEDs, but now I'm not holding my breath. My walls no longer have spots on them and pink light is back on my multi-color tree. I am contently writing in the warm glow of my holiday decorations. Life is good. :)


If you decide to try this on your own LED lights, please be aware of the following lessons I learned during this task:
  • Test-color each bulb to see what you like before tackling a full strand. Some colors (like green) can be partially-colored to warm but not totally obscure. 
  • Blue LED lights will still shine brightly even after being colored over completely by a brand new marker(so don't worry about at least doing it once to see how you like it!)
  • If you have cool white LEDs, coloring them with the red marker will not "warm" them, they will turn red. 
  • The newer the marker, the darker the effect. Older, used markers will impart less ink and will give a lighter effect (I started with an old marker and moved to a new one to learn this). Brand new markers cover more completely and are much more effective at reducing the spotlight effect. 
  • The marker may easily wipe off of the bulbs for a short time, so wear clothes that you don't care about and try not to sit on a white couch. 
  • The task is relatively tedious but listening to Christmas music or chatting with friends while coloring your lights makes it much more fun! 
If you're like me, hopefully you won't hesitate to buy LED lights this year. They are great for the planet and great for your wallet, and now they can even be beautiful too!


Nov 30, 2014

DIY Double-Sided Lit Christmas Tree Topper


It's hard to find a nice double-sided Christmas tree topper that lights up for less than $50, so I decided to make one with supplies from around my house plus a few small purchases! If you're a habitual crafter like me, this project may only cost you a couple bucks at the dollar store because you probably already have most of the supplies.

I was originally inspired by the Bethlehem star tutorial here, but I wanted a 5-point star, I wanted it to be double-sided (so my tree looks nice in the window too), and I wanted GLITTER, so I made several changes. If you're looking for a star of Bethlehem for your tree, you can use their great tutorial!


However, if you want a glittery 5-pointed, double-sided light up tree topper for cheap, read on!


First, decide what size star you want. The final product will be roughly twice the size of the stencil you print, so choose wisely. I've included the stencils at the bottom of the post. Once you've decided on your stencils and have it printed, cut it out and trace the stencil onto a thin piece of cardboard.


Cut along your trace lines using the X-acto knife and ruler to keep your edges straight.


Next, using the stencil as a guide, copy the inner lines onto your cutout using a ruler.


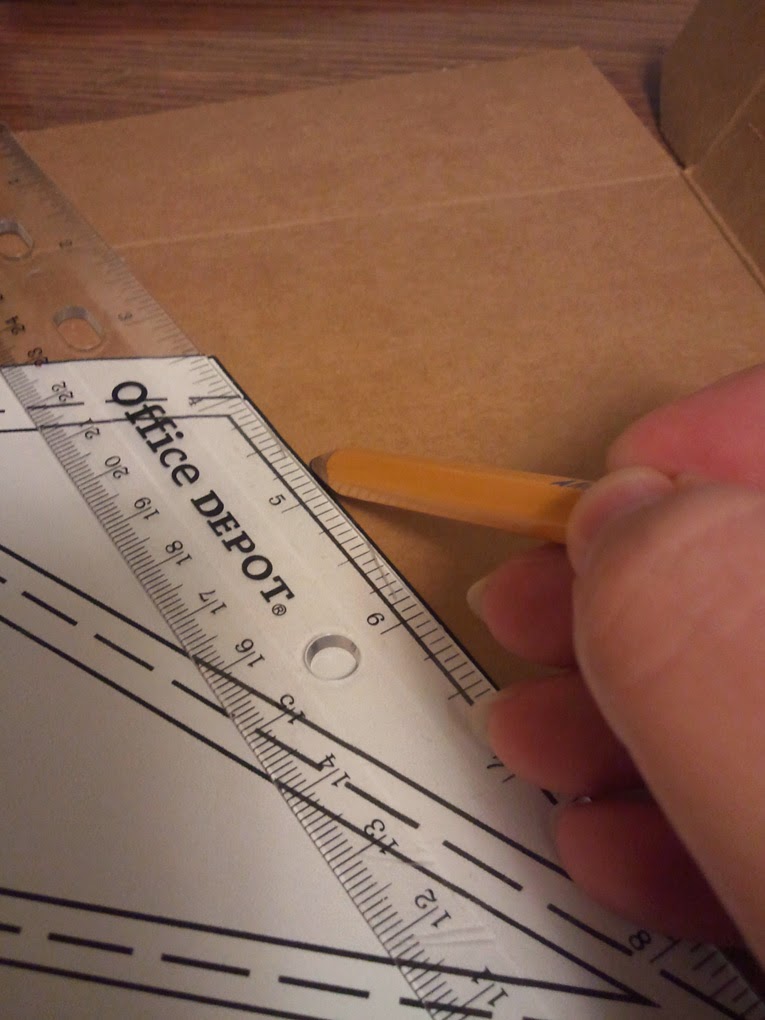
One trick I used was to cover the cardboard cutout with the stencil and then press down on the corners with the point of your pencil to mark where to draw the lines. 


Next, score the dashed lines using your X-Acto knife. Don't press too hard or you'll cut it all the way through! You just want to lightly score the cardboard so it folds nice and neatly. Use your ruler to keep the lines straight. 

Always keep the majority of the cardboard under the ruler for maximum control over your project.


When you're finished scoring, fold along the scored lines. This step is important because once you cut out your "windows," the structure will weaken and it will be much more difficult to fold the cardboard properly. 


Next, use the stencil again to mark the corners of the windows and then draw the window lines with your ruler.
 ( Note: You may want to adjust the size of your windows because the smaller they are the easier they will be to work with. I wanted nice thin lines so I kept them thin but it did require some extra patience.)


Use your X-Acto knife and ruler to carefully cut out the windows. 
You can use a thick piece of recycled cardboard as a cutting mat, or you can use a cutting mat if you own one to protect your table/desk/work surface.


Now that you've made your first point, you can draw the lines for the others all at once, being careful to score the correct lines and do your folding before you cut out the windows. 


Now, repeat these steps 4 more times to make a total of 5 points!


Next, we need to make the cone that will help support the star and hold it on the top of the tree. Take a new piece of cardboard and cut it into a rounded triangle and then roll it into a cone shape. Apply some E-6000 or hot glue to the edges and use binder clips and masking tape to hold it while it dries. 


Put masking tape on the tabs to protect your surfaces for the glue later. Make sure the cone's glue is dry. We're about to glitterfy our star! 


Pour some Mod Podge into a bowl and add your glitter. Stir it with your paintbrush and paint it thickly onto your star points and your cone. 


After about 15 minutes, remove the masking tape. 
The Mod Podge won't be completely dry yet so this will help prevent cracking or flaking (which might occur if you let it dry completely and then remove the tape).


Next, use the leftover cardboard from the window cut-outs to trace a slightly larger shape onto some parchment paper for your windows. You will need 20 total.


Cut them out and attach them to the inside of your dried star points. E-6000 Quick Hold works best.


Now you've completed a star point!


Repeat 4 more times and then glue the sides of ONLY THREE of your star points together with your E-6000.
You can use rubber bands here to help hold it together while it dries.


Why only three? I show rubber bands around all 5 in the picture. That's because I did it wrong at first, oops! We learn as we go. You want to leave two of the star points open so that when you glue the whole thing together you can easily insert and arrange your lights within the star. It also provides an important opening for your cone. So, don't do what I did. Only glue three of them. :)


Then glue those three star points together, using your binder clips to hold the points together while they dry. 


Thread the LED light strand(s) through your glittery cone and insert them into the star making sure that the battery case (or plug) is threaded through the bottom of the cone first. Only one light strand is shown here but in the end I used two. They were only $1 at Dollar Tree.
Optional: If you're particular about where the lights are positioned, you can use binder clips to guide the lights as you like. I did this at first but in the end, I found that stuffing 20 or so lights in there worked just as well for me.


Attach the last two points of your star, keeping the 2 open seams facing down. 


Insert your skewers into the cone and up to the top of the star to keep it upright. Use additional skewers as needed to balance the star on top of your tree. 
Flip the switch to turn on your lights and that's it! You're done! Now you have a beautiful glittering lit star that you can be proud of. :) 


To make this glittery star, you'll need the following:

  • Recycled cardboard boxes (thin, like cereal or pie boxes)
  • Parchment or Waxed Paper
  • Glitter
  • Mod Podge
  • Set of 10 to 20 LED Christmas Lights
  • Star stencil 
  • X-acto knife or other sharp utility knife
  • Pencil
  • Ruler
  • Glue (E-6000 Quick Hold preferable, hot glue or tacky glue will also work)
  • Scissors
  • Paintbrush (or foam brush)
  • Masking or Painters tape (not pictured)
  • Long bamboo skewers (not pictured)
  • Small binder clips (if not using "Quick Hold" glue)
  • Rubber bands (optional)
For the lights:
I got a nice string of 10 battery-operated LEDs at the Dollar Tree. In the end I decided to purchase yellow ones to match my tree better. I also discovered that my star lit up best with at least two strands (20), but that will depend on the size of your star. Dollar Tree also sells white, blue, red, and yellow LED lights during the Christmas season. If I were to do it again I would choose white and red.

Mod Podge and E-6000 Quick Hold you will probably need to buy from a craft store, but the rest of the supplies you can probably find around your house or in the dollar store.

Stencils:
I've made three different print-ready sizes for your convenience. I used medium for my star and the width of my star is 13 inches.
7.5" Large (for a very tall, 9+ ft tree)
6.5" Medium (for a 6.5-9 ft tree)
5.5" Small (for a 4-6.5 ft tree)

     
Large                       Medium                    Small


Enjoy your beautiful DIY home-crafted double-sided light up 5 point tree topper!